Menu
What's your personal favorite music streaming service? Someone believes that there is plenty of fantastic music streaming services on the market nowadays, so it’s difficult for them to select the best one. Platforms like Apple Music, Spotify, Amazon Music, YouTube Music, Tidal, Pandora, and more are all available choices.
If you’re a Tidal subscriber now and you wish to cancel the subscription to turn to another service more suitable for you, you come to the right place. You can get a perfect method for keeping the Tidal playlist after canceling the Tidal subscription.
If you would like to stop the Tidal subscription, you can choose one method below according to your own situation.
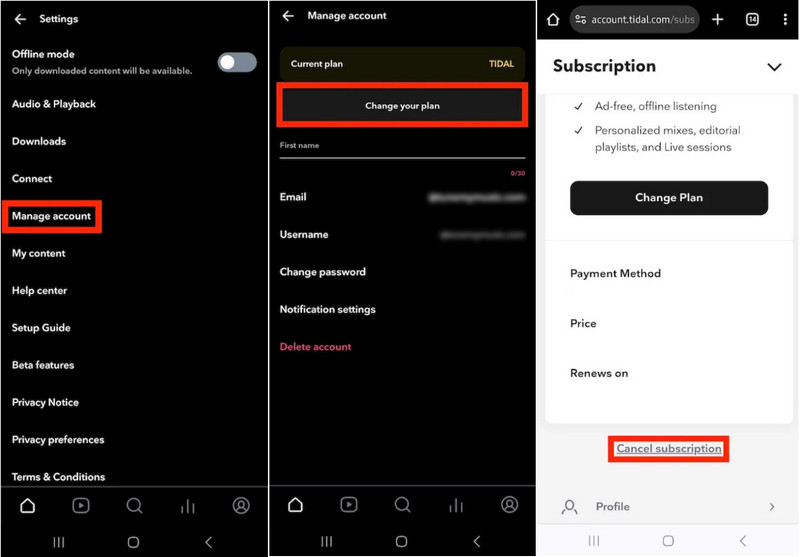
To cancel the cancellation on an Android device, you can follow these steps:
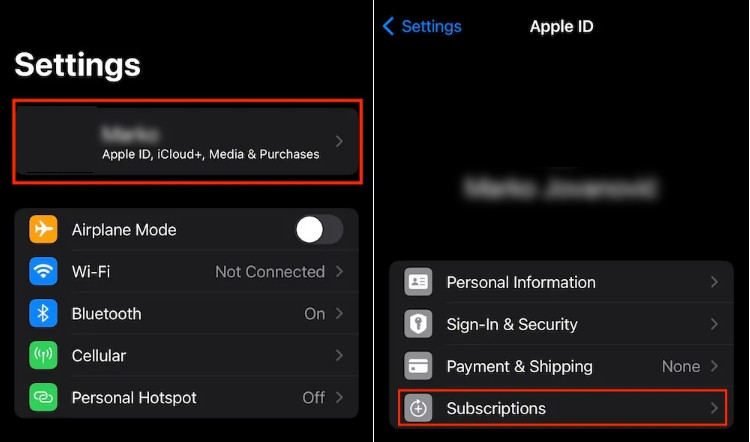
To cancel the cancellation on an iPhone or iPad, you can cancel it through iOS settings.
To cancel your Tidal subscription on a computer, follow these steps:
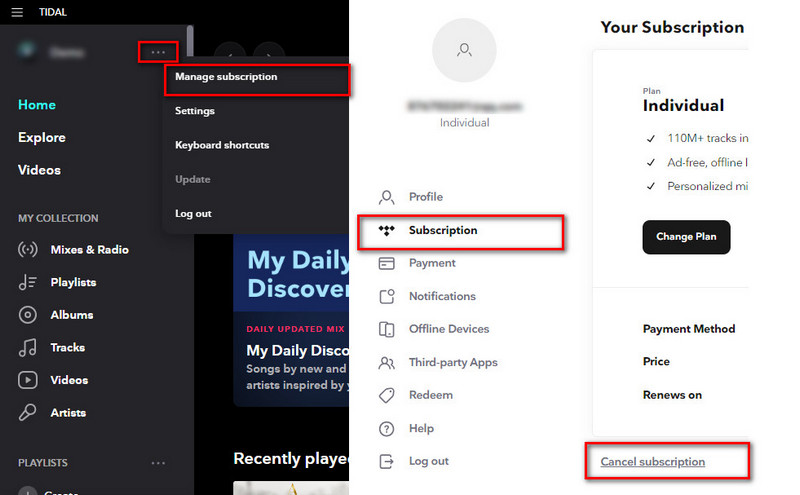
To cancel your Tidal subscription through Sprint, follow these steps:
If you paid through other mobile carriers other than Sprint, you’re supposed to contact the customer service of that company for further help.
Note that canceling your subscription will stop future charges, but you will still have access to Tidal until the end of your current billing cycle. After that, you will lose access to the premium features of the service. If you want to get access to your Tidal playlists again, you need to renew the subscription. Alternatively, you can refer to the next part to download all your preferred Tidal songs, albums, and playlists to a local PC for permanent playback.
As you know, most streaming music services have a common feature. When your account expires and hasn’t been renewed, your playlists will be unable to be in playback online or offline. Therefore, before becoming a member of a certain streaming media service platform, you should think clearly, because when you change to another platform service, your previous playlists will not be synchronized or transferred.
Personally, the most secure way for you is to permanently save these playlists to the computer or mobile phone, then you can enjoy them at any time. You will save a lot of time from now on. You don’t have to worry about how to transfer songs between different platforms, players, and devices anymore. And the tool you need is Tidabie Tidal Music Converter.
This amazing converter is the top priority for you to keep Tidal music forever on a local disk. You can batch download the music tracks as widely-used MP3, AAC, WAV, FLAC, ALAC, and AIFF. The original high audio quality up to Master will be kept. More importantly, the converted Tidal songs hold ID3 tags, including title, artwork, artist, album, and others. Read on to see details.
Tidabie Tidal Music Converter
Download and install Tidabie Tidal Music Converter by tapping the button above.
STEP 1 Double-click to run the converter. On the homepage, you are provided two options - app mode and web player mode. The largest difference between them is that the app mode requires the TIDAL app installation and can save Master quality at 5x or 1x (for Mac) the speed, while the web player mode works via the built-in Tidal web player and can preserve up to HiFi quality at up to 10x fast speed. Hit on the mode you prefer and go ahead to log in to your Tidal account. This step is necessary. If you don't have an account, you can sign up for one and Tidal will always provide a free plan to all new users.
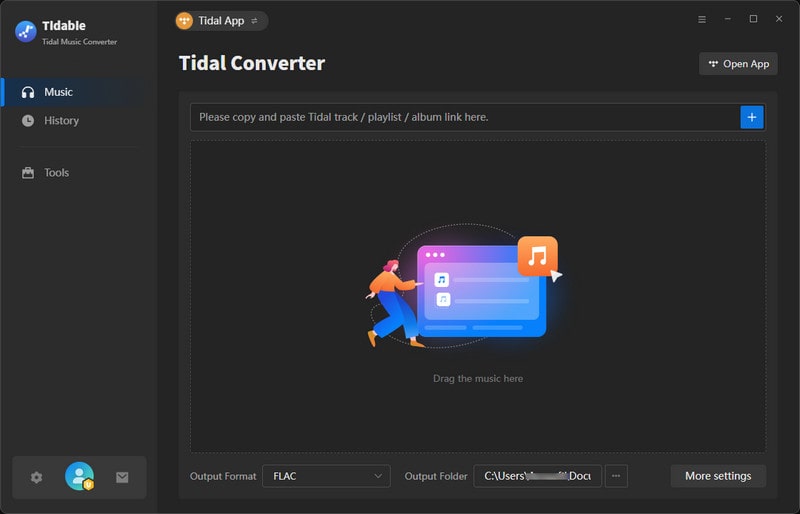
STEP 2 After the selection and login, you can find a Settings tab from the bottom left corner. Finish the necessary convert and output settings before downloading. As your need, you can check the output format as MP3, AAC, FLAC, WAV, ALAC, or AIFF. When you choose lossless audio format or Auto as the output format, Tidabie will keep up to HiRes quality. And to make it easier to find the converted items, you can customize the save path by yourself. As you can see from the picture below, there’re also other parameters that can be chosen. When everything is ready, go to the next step.

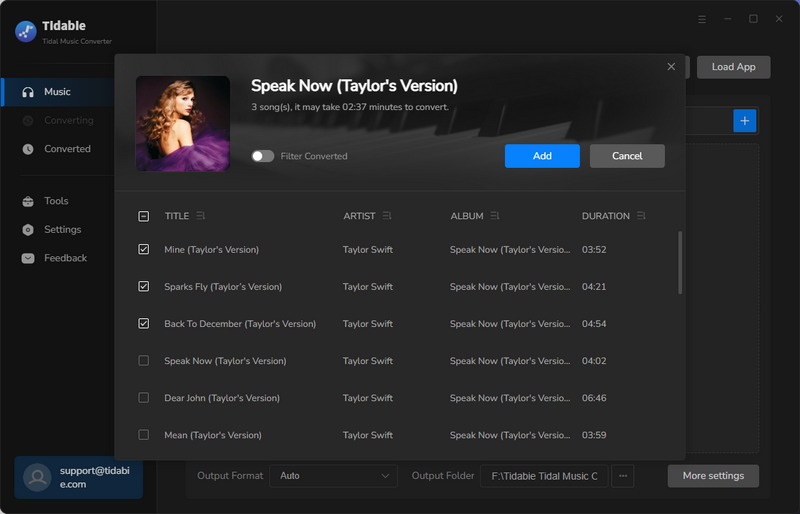
STEP 3 Browse the Tidal and find the playlist you wish to download. Directly drag and drop the title right into Tidabie if you use the app mode. If you use the web player mode, open the target playlist or album, then click the blue Click to add icon. The basic information about these songs will be displayed on a pop-up window. You can choose all or just part of the songs to convert. Click Add to confirm.
STEP 4 After adding all the songs you want, click on Convert to begin the conversion. Please ensure a good internet environment and wait until the songs are finished converting.
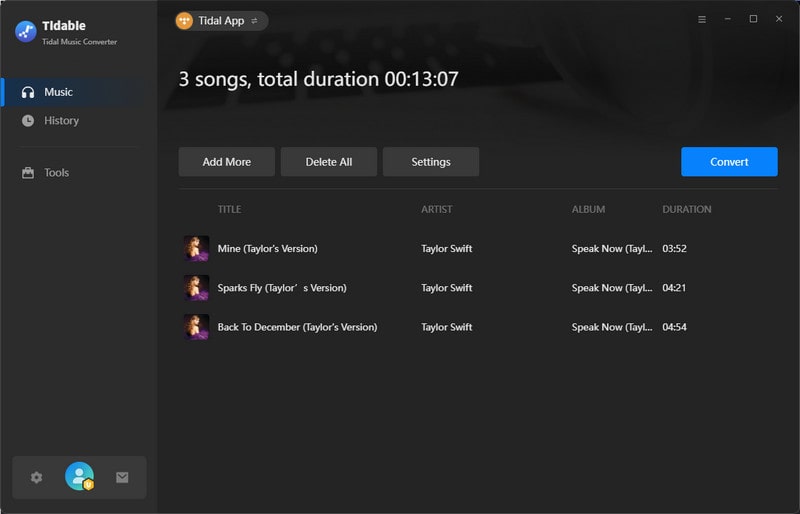
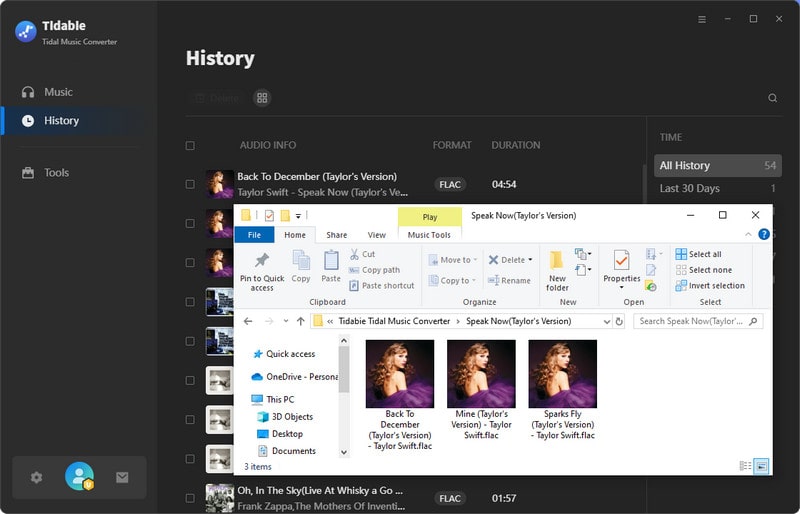
STEP 5 After conversion, turn to the Converted module to check the converted songs. If you want to check and play it on the local folder, move your mouse over one of the converted songs and tap on the folder icon, then a smaller window will appear automatically.
1. What happens when you cancel your TIDAL subscription?
Firstly, you are not permitted to stream Tidal music in HiFi or HiRes quality. Secondly, you are deprived of listening to Tidal music offline. Thirdly, the Tidal cached files are not allowed to be accessed. However, if you've learned how to back up your Tidal songs and playlists via Tidabie Tidal Music Converter in the previous part, you have nothing to worry about.
2. Can you listen to music on Tidal without a subscription?
With Tidabie Tidal Music Converter, you can download TIDAL songs via you are still a TIDAL subscriber. It downloads Tidal songs as local files in multiple formats, like MP3, AAC, WAV, FLAC, AIFF, and ALAC. Even if you are no longer a subscriber to Tidal, you can also play the downloaded songs offline for free.
Now you know the quick and simple way to cancel your Tidal subscription once you don't want to continue anymore. But more to the point, we learn about a good converter that can keep our Tidal playlists even after the cancellation of Tidal. Just install one powerful Tidabie Tidal Music Converter now and it’s time to enter the world of music!
Jacqueline Swift | Senior Writer
Tips You May Want to Know
Sidebar
Hot Tutorials
TIDAL Tutorials
Secure Online Payment
Money Back Guarantee
24/7 Customer Support

Free Updates and Support
