How to Use Tidabie Music Go
Tidabie Music Go is tailored for downloading songs, albums, podcasts, playlists, radio, audiobooks, and other audio files from popular streaming music services, including Spotify, Amazon Music, Apple Music, Tidal, YouTube Music, Deezer, Line Music, Pandora Music, SoundCloud, and more. With this wonderful all-in-one tool, you no longer have to deal with the hassle of installing multiple downloaders, making it the perfect solution for seamless transitions between different streaming services. Now, let's see how to use it!
 Download the PDF User Manual of Tidabie Music Go
Part 1. How to Register Tidabie Music Go
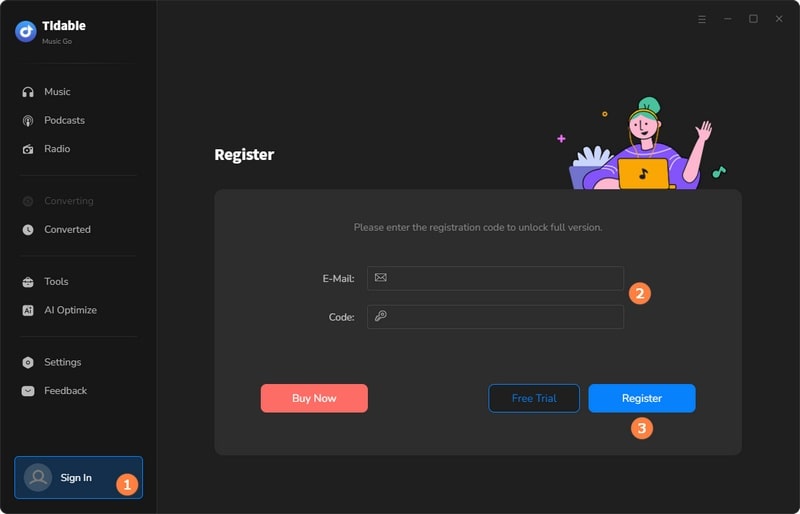
Upon completing your purchase, you will receive a confirmation email containing your registration information. Subsequently, you can activate the program by following the steps below:
STEP 1 Run Tidabie Music Go. Go to the main interface and click the blue profile icon in the lower left corner.
STEP 2 Copy and paste the registration Email and Code you received into the registration interface.
STEP 3 Click on the "Register" button.
Part 2. How to Download Music onto Computer with Tidabie Music Go
📌 Directory:
Tidabie Music Go offers a wide range of options to retrieve music from various sources. To cater to different preferences, it employs three methods that users can choose from.
- Download Music from the App: Spotify, iTunes/Apple Music, Amazon Music, Tidal.
- Download Music from the Web Player: Spotify, Apple Music, Amazon Music, Tidal, YouTube Music, Line Music, Pandora.
- Download Music from the Website: Audible, Dailymotion, YouTube, Vimeo, SoundCloud, and more.
2.1 Download Music from the App
STEP 1 Select Music Source
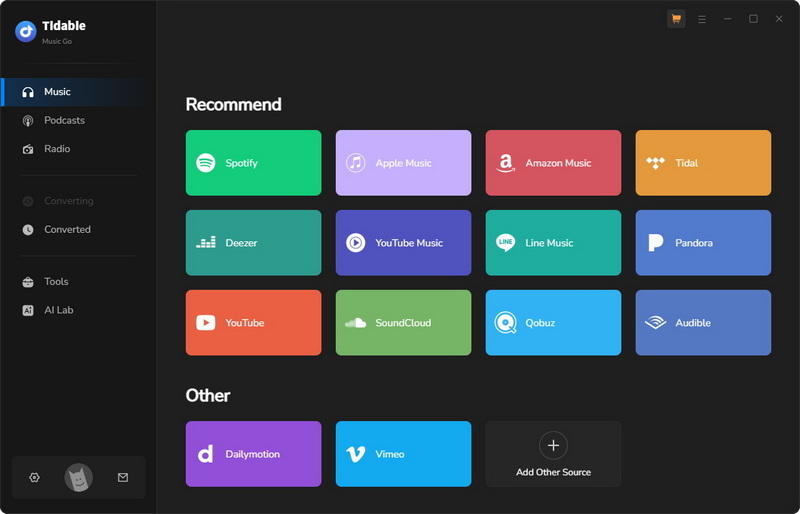
When you first launch Tidabie Music Go on your computer, you will see the main interface where some major streaming music platforms are listed.
If you would like to download high-quality music, you can download music from the app. As mentioned above, you can record music from Spotify, iTunes/Apple Music, Amazon Music, and Tidal apps.
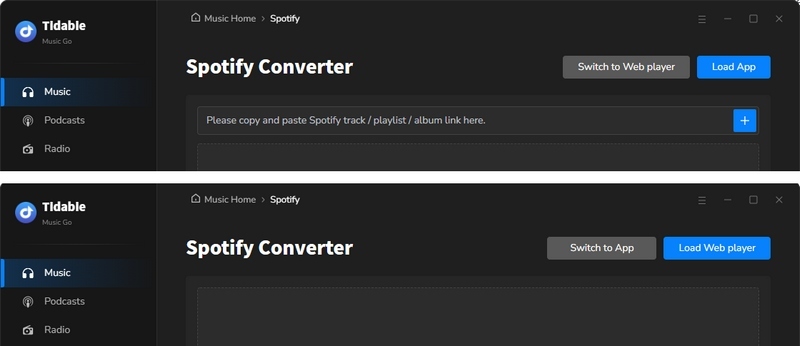
Here, we take Spotify as an example. Tap on the "Spotify" tag from the main interface. Normally, once you click on it, the preinstalled Spotify app will pop up. (If you haven't installed the Spotify app, then the Spotify web player will pop up. Generally, if you would like to download music from the app source, you need to download the app first.) Then you need to log in to your Spotify account to access your online music library.
If the Spotify app does not show up, just hit the "Open App" icon in the upper right corner to open it manually. Similarly, if you want to switch the recording source from the web player to the app, hit the "Spotify web player" icon at the top center of the window, then click "Spotify App".
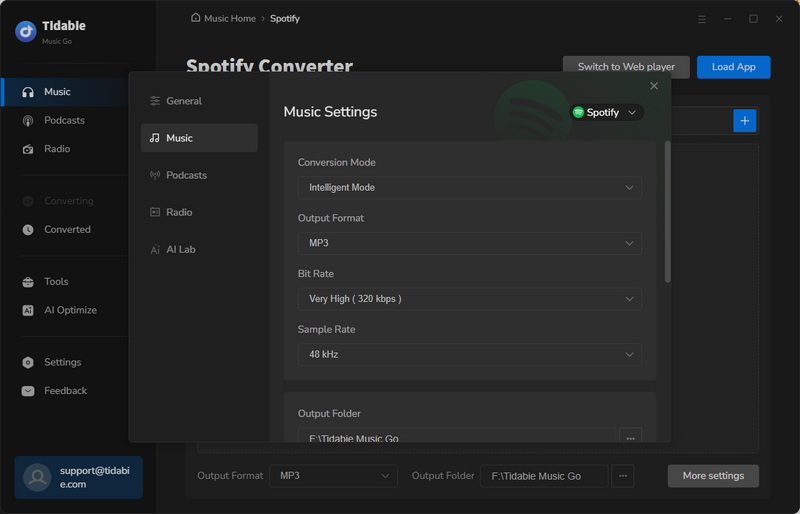
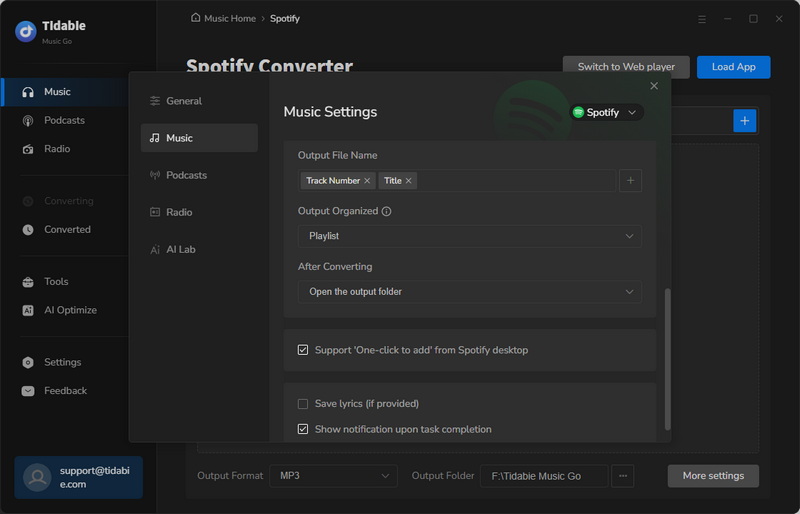
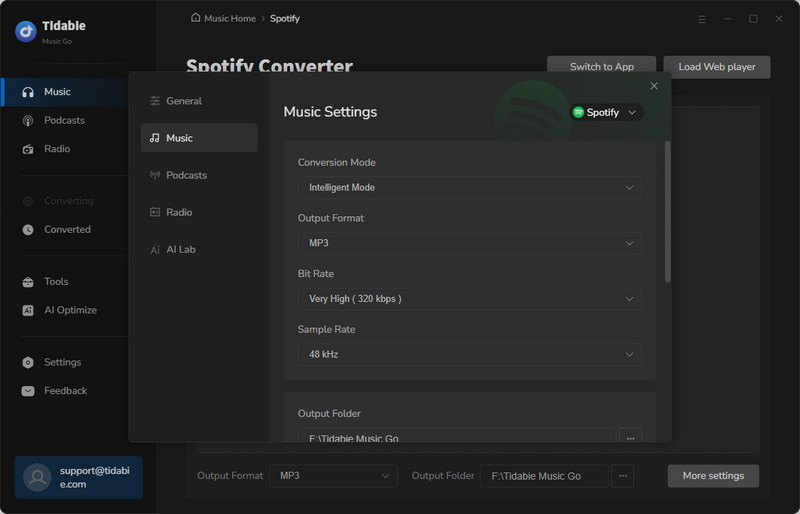
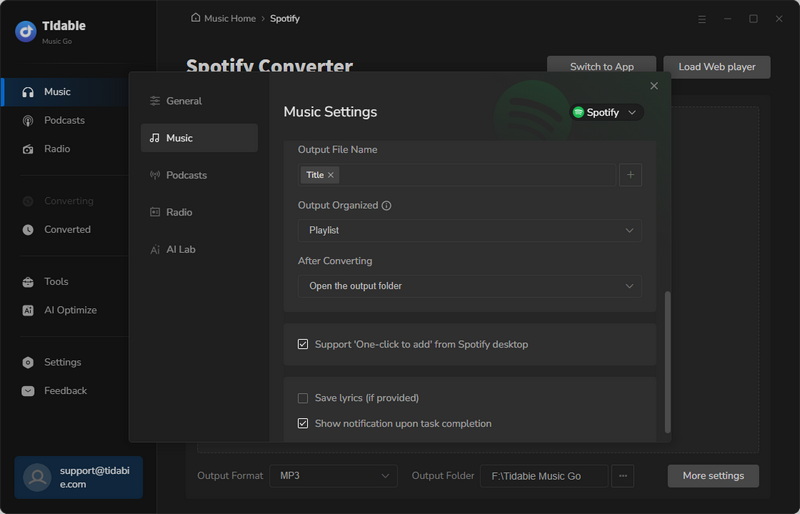
STEP 2 Customize Output Settings
Navigate to the "Settings" module on the left-side bar. You can adjust different settings according to your actual needs. Changeable settings are divided into five parts, which are "General", "Music", "Podcasts", "Radio" and "AI Lab".
In the "Podcasts" part, you can change the output folder path of the downloaded podcast audio files.
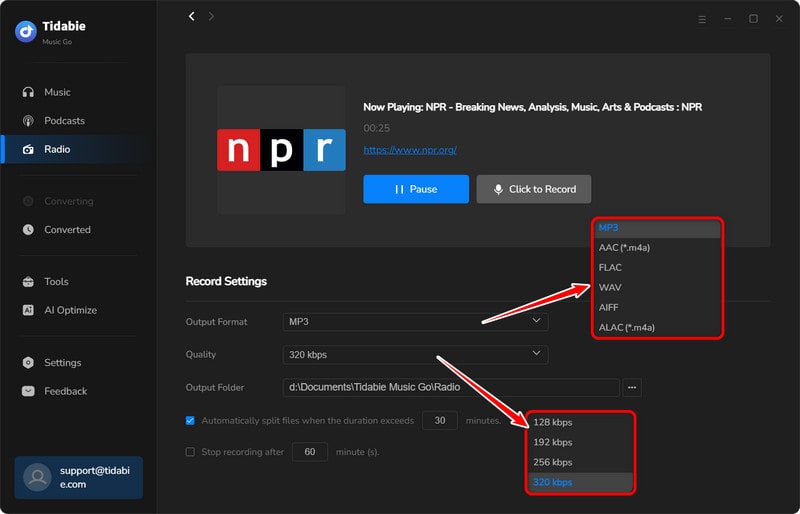
In the "Radio" part, you can change the output format, quality, and output folder path, etc.
In the "History" part, you can check all the contents you've downloaded.
In the "Tools" part, you can use many additional tools provided by Tidabie, like AA/AAX Converter, Format Converter, Burn CD, Audio Editor, and Tag Editor.
In the "AI Lab" part, you can split audio into background sound and vocals.
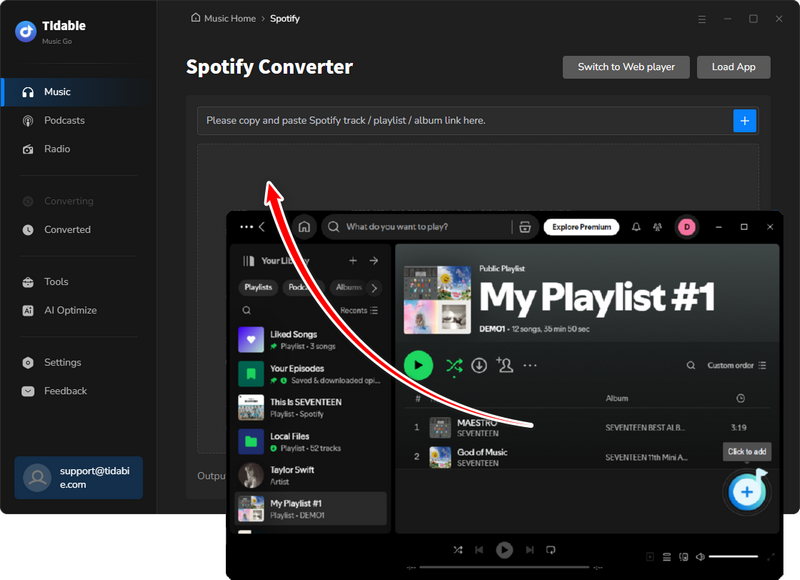
STEP 3 Add Music to Download Task List
Go to the "Music" page after finishing the settings. The next step is to add songs to the task list. You have three choices to add songs.
Method 1: Drag and drop a song/album/playlist from the Spotify app to Tidabie's "Drag the music here" area and start parsing.
Method 2: Copy and paste the URL of any song/album/playlist to Tidabie's parsing box on the "Music" page.
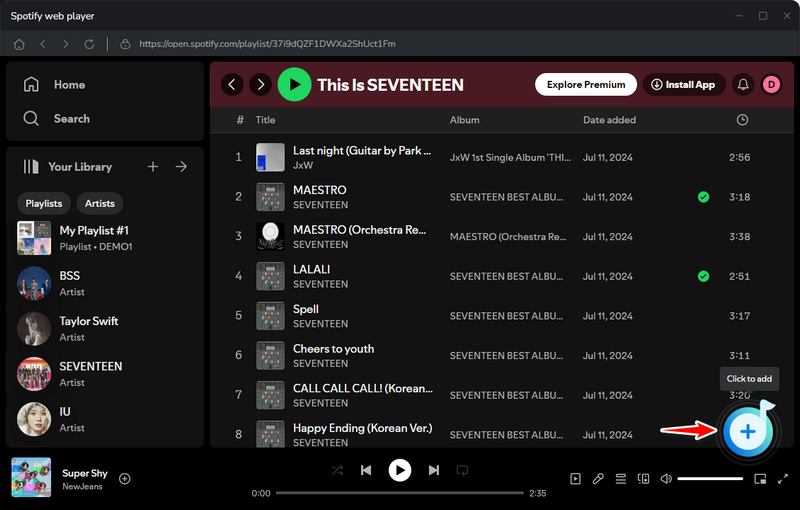
Method 3: Open any song/album/playlist, and click on the "Click to add" button in the lower right corner.
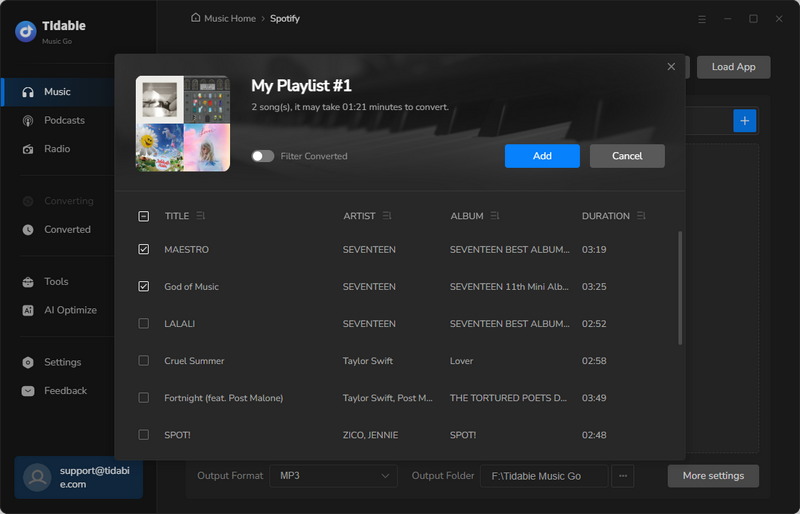
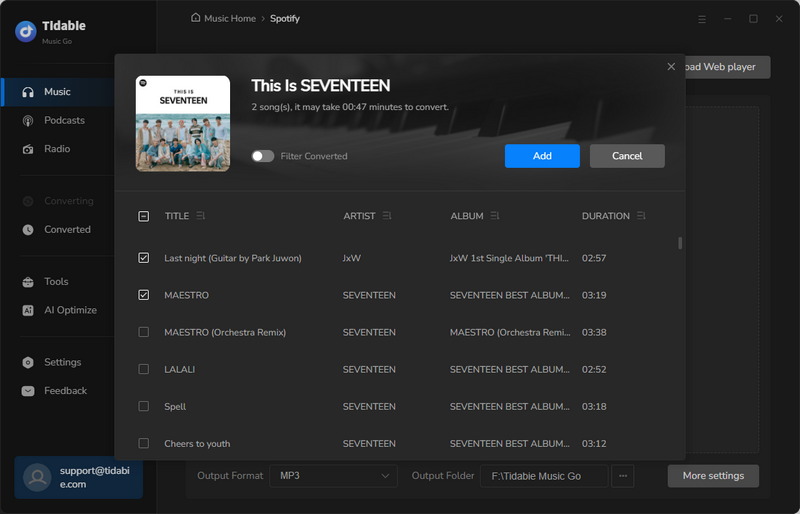
After parsing, a new window will pop up and all the tracks from your chosen album/playlist will be listed there. Then just tick your desired tracks and click on the "Add" icon.
STEP 4 Start Downloading
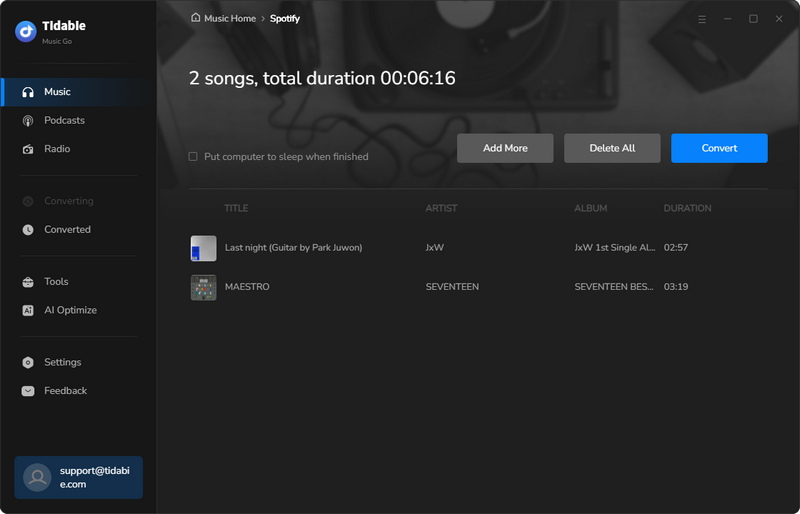
Click on "Add More" if you want to choose more songs. If not, hit "Convert" to start downloading.
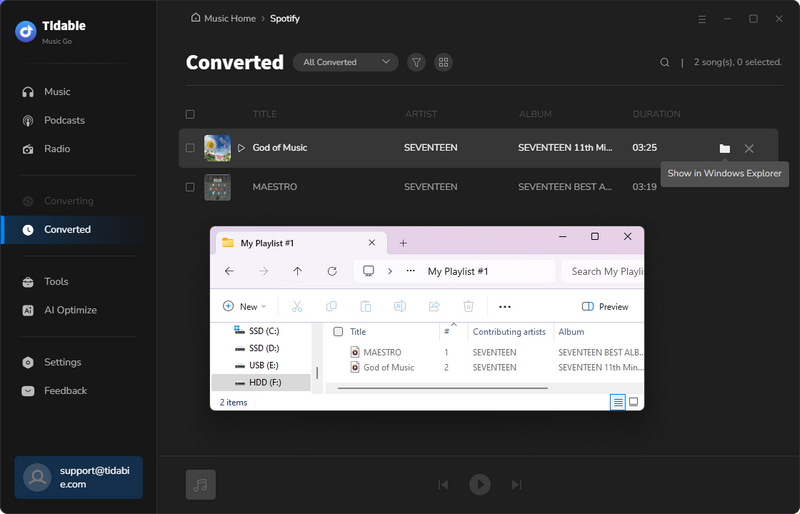
STEP 5 Check the Downloaded Music Files
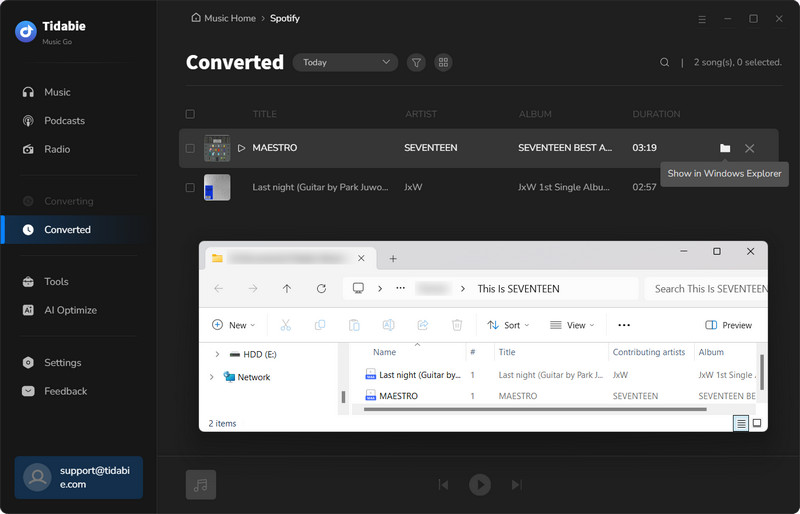
Go to the "History" module, you can check the download history. By clicking on the folder icon of each song, you will be directed to the local address of the song.
2.2 Download Music from the Web Player
STEP 1 Select Music Source
Downloading music from the built-in web player enables you to download music with up to 10x speed.
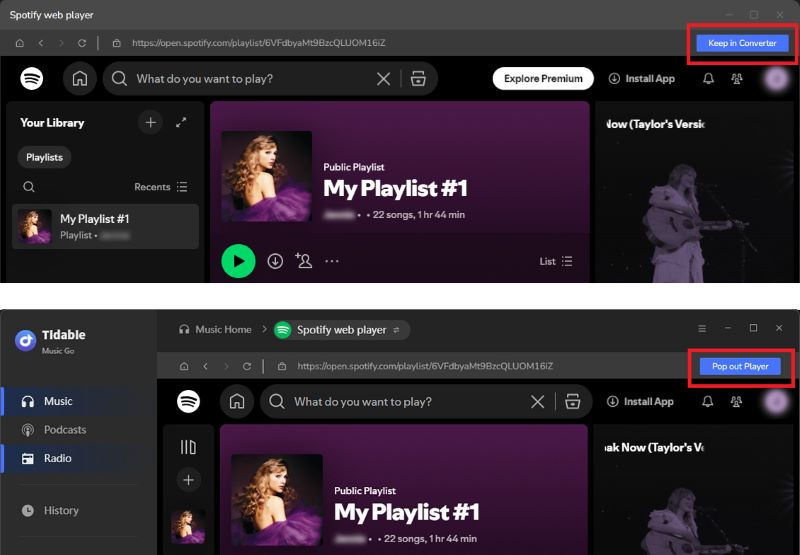
Here, we take the Spotify web player as an example. Click on the "Spotify" tag on the main interface. The embedded Spotify web player will pop up automatically if you haven't installed the Spotify app on your computer. Follow the on-screen instructions to log into your Spotify account.
To keep the Spotify web player within Tidabie Music Go, click the blue "Keep in Converter" icon in the upper-right corner. To use a standalone Spotify web player window, click "Pop out Player".
STEP 2 Customize Output Settings
Under the "Settings" module, you can customize output parameters to your preference. Adjustable options are listed below:
STEP 3 Add Music to Download Task List
Turn to the Spotify web player. Open your desired song/album/playlist and hit the blue "Click to add" button to parse songs.
Tick the songs you want and tap on the "Add" button.
STEP 4 Start Downloading
If you would like to batch download more songs from different playlists/albums, just click "Add More" and repeat the adding actions. Once you have finished choosing, tap on "Convert".
STEP 5 Check the Downloaded Music Files
You can navigate to the "History" module to check the downloaded music files once the downloading process is complete.
2.3 Download Music from the Website
STEP 1 Select Music Source or Add Other Website Source
You can choose a music source from the options displayed on the main interface. Or you tap on the "Add Other Source" to record music from the platform you want. The latter option requires you to enter a name and URL to access the platform.
Here, we take Vimeo as an example. Simply tap on "Vimeo" to initiate the built-in Vimeo website. Next, log into your account.
STEP 2 Customize the Output Settings
Go to the "Music" page, you will be able to customize the record settings directly. The following details are for your reference.
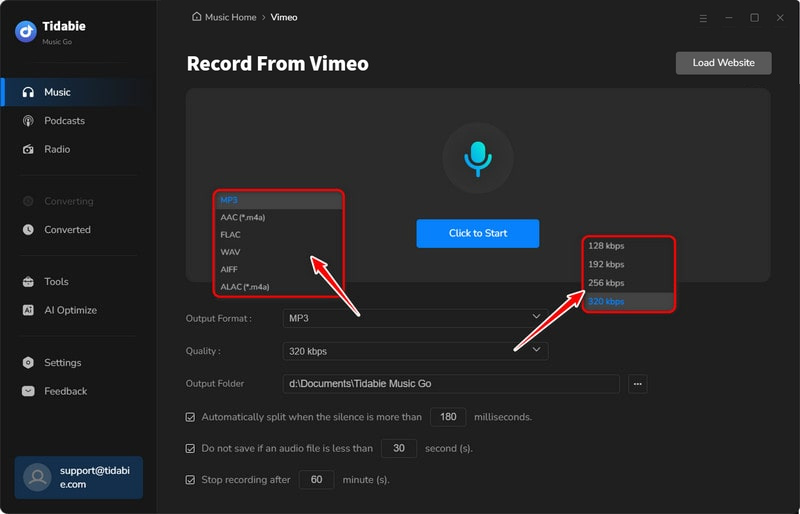
STEP 3 Start Recording
When the preparations are done, you can open the music you wish to record and start recording by clicking the "Click to Start" button. Hit "Stop Recording" when you want to end the recording.

STEP 4 Check the Downloaded Music Files
When the recording is finished, the music files will be stored in the designated folder. You can navigate to the "History" section located in the left-side menu bar to check the downloaded tracks. In addition, hitting the folder icon will lead you to the output folder directly.

Part 3. How to Play and Record Radio Shows on Tidabie Music Go
3.1 Play Radio Shows on Tidabie Music Go
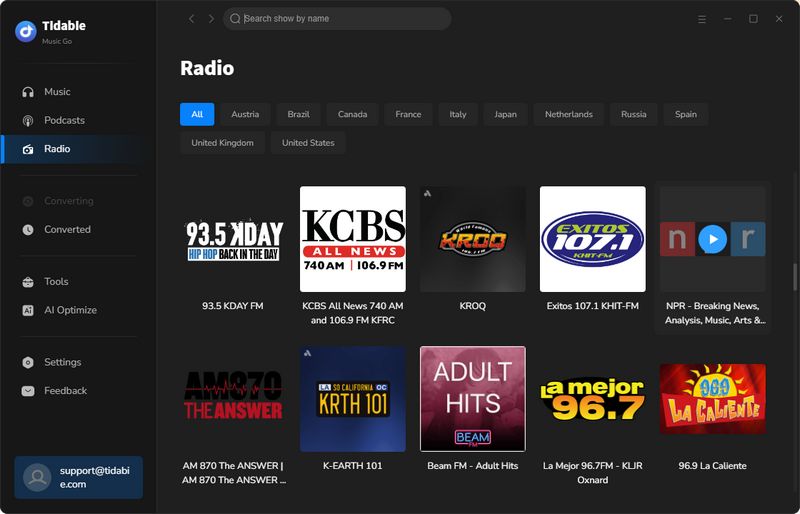
STEP 1 Launch Tidabie Music Go and head to the "Radio" module. You can find your preferred radio programs in this module.
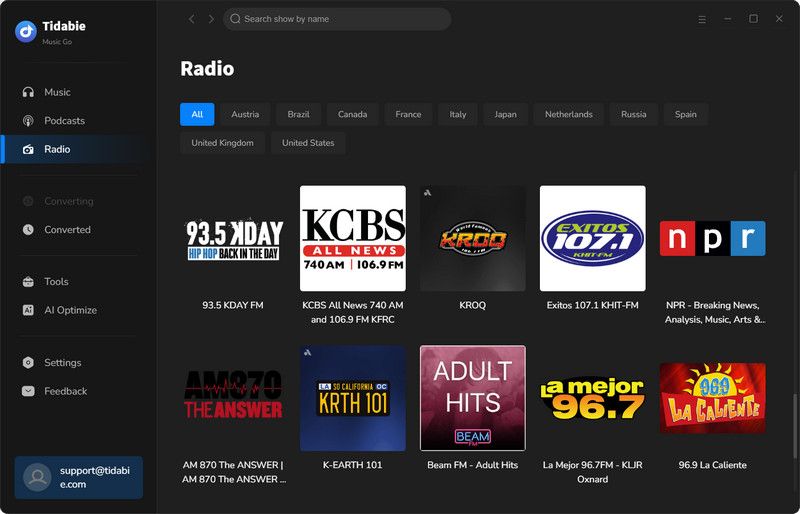
STEP 2 Tap on any radio program, you will be directed to the full page of the radio program and it will start playing immediately.
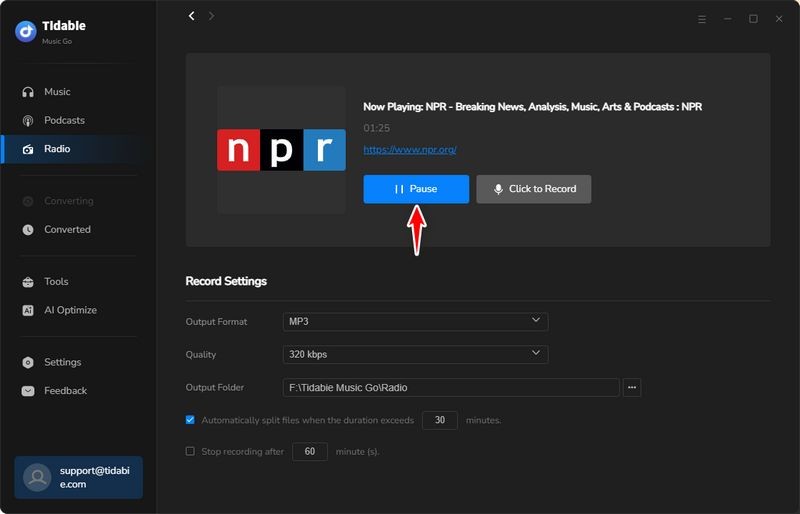
Additionally, you can stop playing the radio by clicking the "Pause" button or restart again by clicking "Play".
3.2 Record Radio Shows on Tidabie Music Go
STEP 1 Before recording, you may change the output format, quality, and output folder path, or you can decide when to stop recording, according to your requirements.
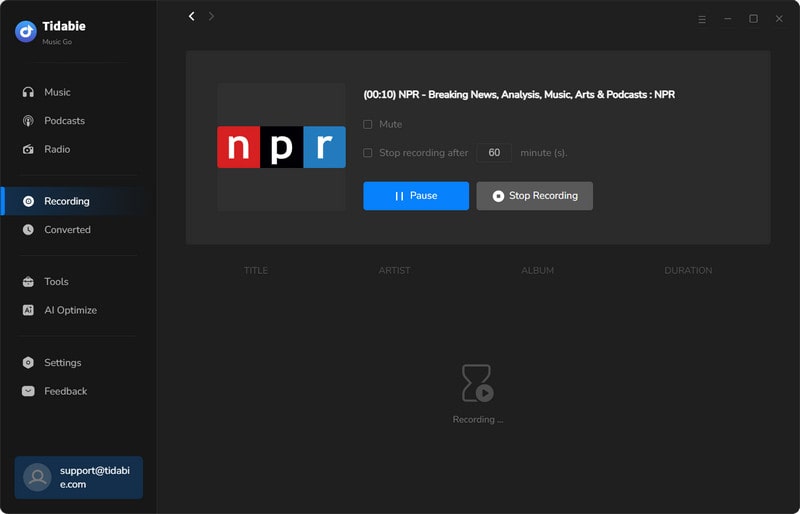
STEP 2 Tap on the "Click to Record" button to start recording the radio show. If you haven't set automatically stop recording time, you can manually stop it by hitting "Stop Recording". In addition, it is worth mentioning that Tidabie allows background recording. By ticking the "Mute" box, the program will record the radio show in the background, which means you can handle multiple tasks on your computer while recording.
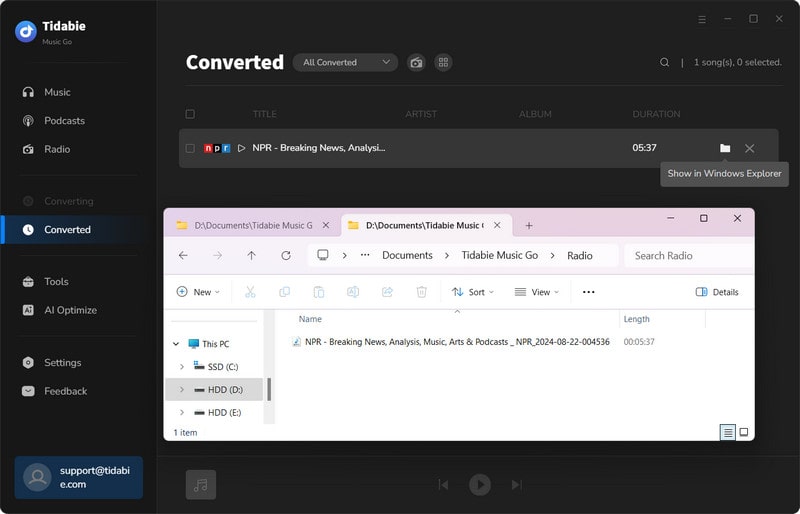
STEP 3 After finishing recording, you may find the recorded audio files in the "History" section.
Part 4. How to Play and Download Podcasts on Tidabie Music Go
📌 Directory:
4.1 Play Podcasts on Tidabie Music Go
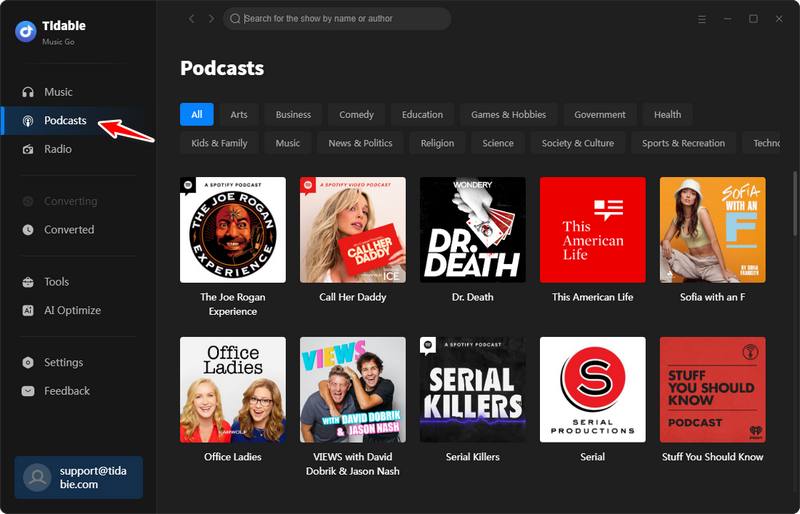
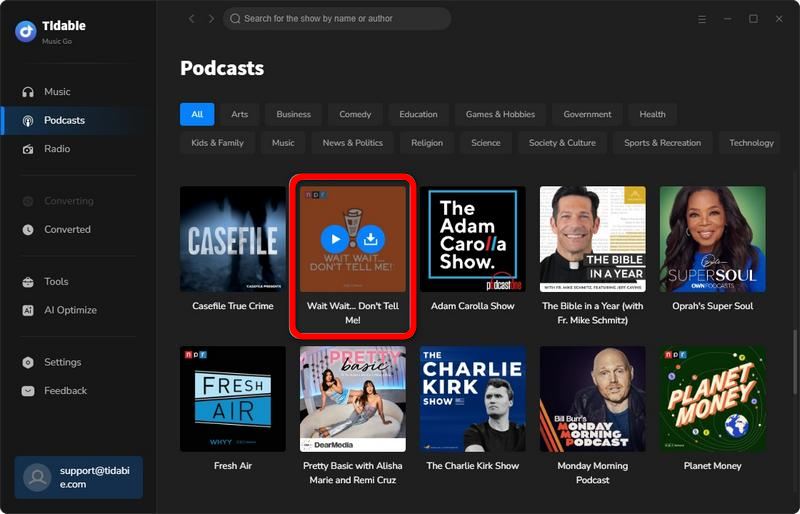
STEP 1 Launch Tidabie Music Go and go to the "Podcasts" module in the left-side menu.
STEP 2 Find the podcast episodes you like. You may scroll up and down to pick any podcast you prefer. Or you can type in the podcast name in the search bar to find it directly.
STEP 3 When the mouse is hovered on a specific podcast episode, you will see the ![]() and
and ![]() icon. When you tap on the
icon. When you tap on the ![]() icon, the latest episode will be played immediately. If you would like to listen to the previous episodes, you may tap on the episode cover to go to the detailed page, where you can play previous podcast episodes by clicking on the play icon next to each episode.
icon, the latest episode will be played immediately. If you would like to listen to the previous episodes, you may tap on the episode cover to go to the detailed page, where you can play previous podcast episodes by clicking on the play icon next to each episode.
4.2 Download Podcasts on Tidabie Music Go
STEP 1 You can decide the output file path before downloading podcasts to your computer. You may head to the "Settings" section and change the output folder path under the "Podcasts" part.
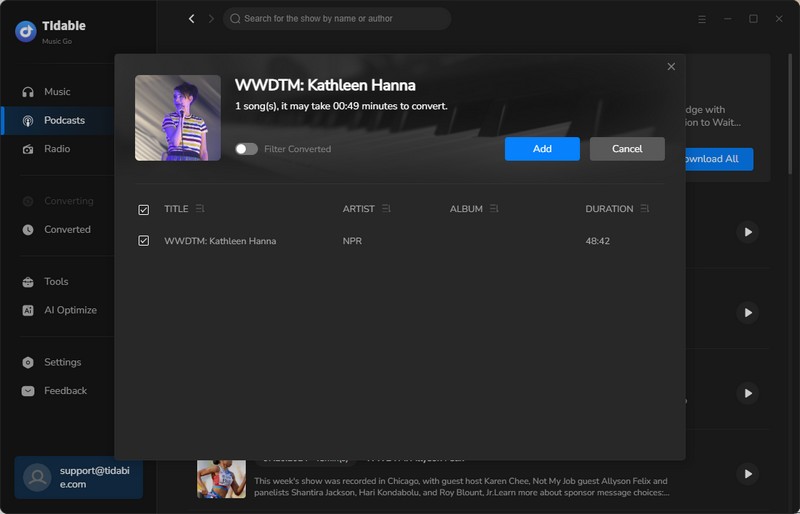
STEP 2 Navigate to the podcast detailed page. You can hit the download icon next to each song and click "Add" to download one specific podcast.
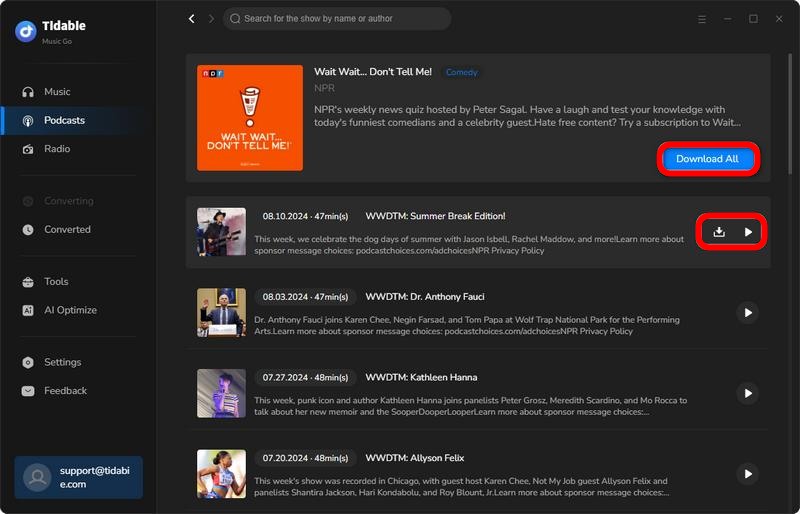
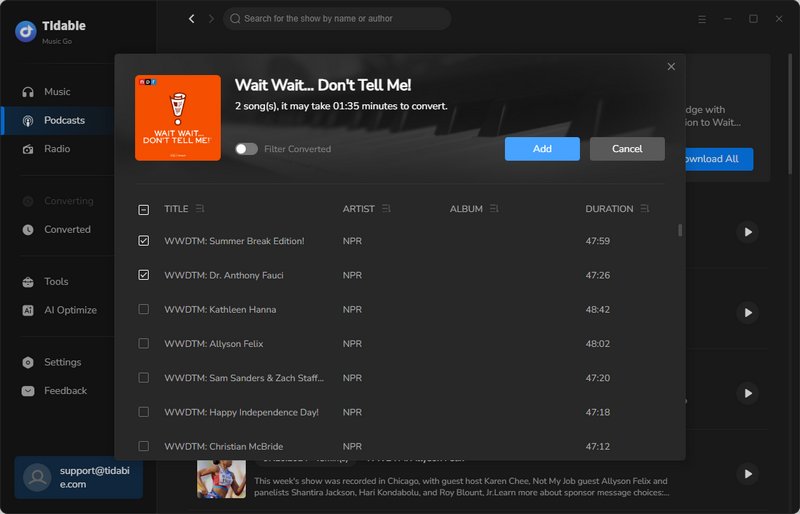
To download multiple podcast episodes, you may click "Download All", tick the wanted episodes, and hit "Add" to start downloading.
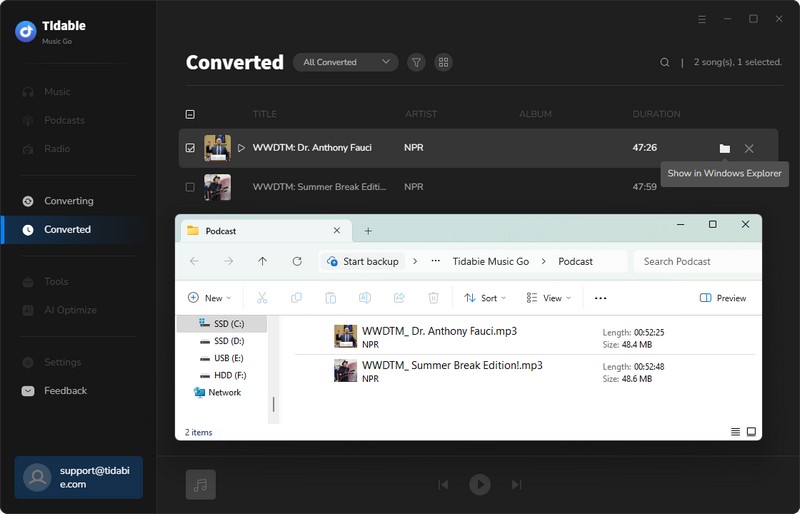
STEP 3 Once the downloading is finished, you may go to the "History" section to check the downloaded podcasts. Or you can tap on the folder icon next to each podcast to its local address.
4.3 Video Tutorial: How to Play and Download Podcasts for free
Part 5. How to Use Advanced Tools on Tidabie
📌 Directory:
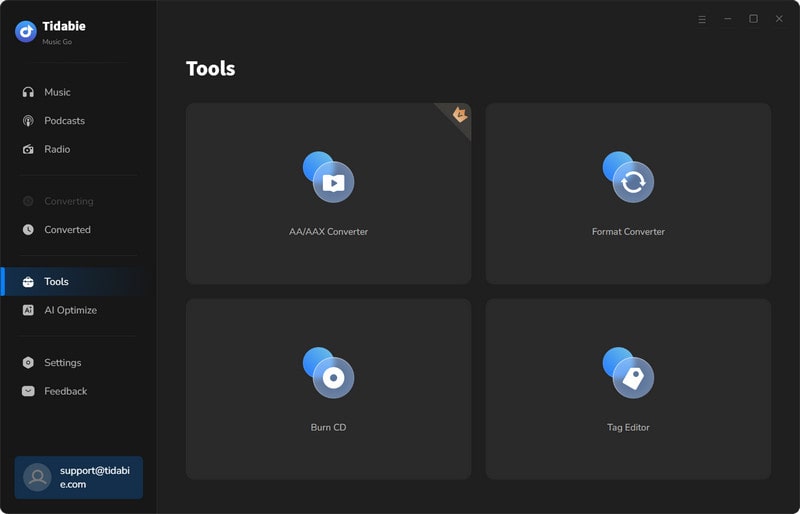
Tidabie Music Go has made significant improvements to enhance your user experience. It provides a range of powerful tools for you to enjoy additional features and functions. Let's delve into how to make the most of these tools.
5.1 AA/AAX Converter
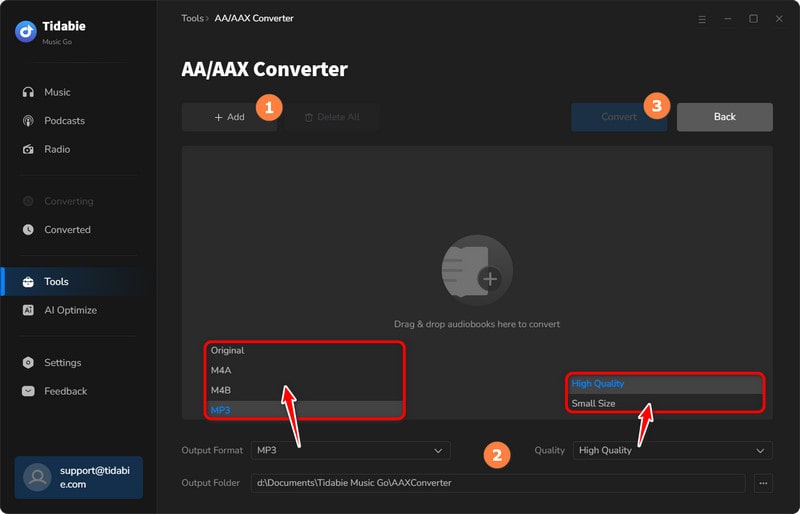
Tidabie offers a helpful tool for converting AA/AAX audiobooks into M4A, M4B, and MP3 formats, providing users with convenient options for their audiobook conversion needs.
STEP 1 Go to the "Tools" section, and click on the "AA/AAX Converter" icon.
STEP 2 You can directly import the audiobooks AA or AAX files to the converter by clicking "+Add".
STEP 3 Set the output format (MP3/M4A/M4B), quality, and output folder before hitting the "Convert" button.
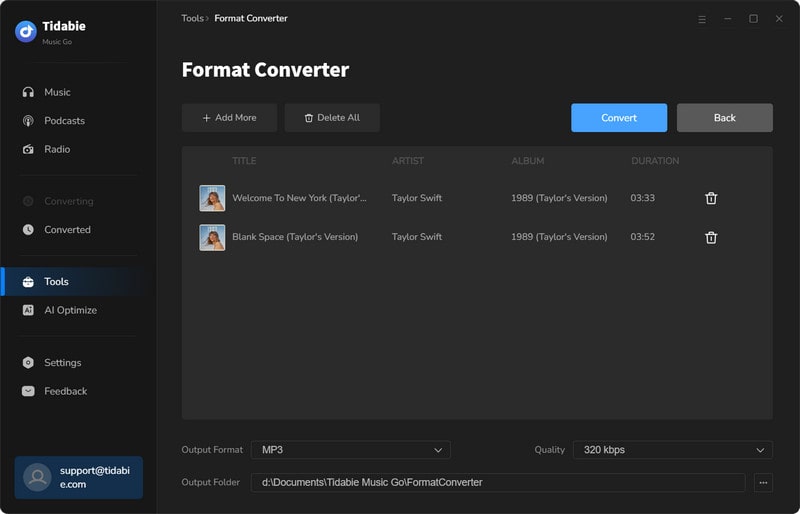
5.2 Format Converter
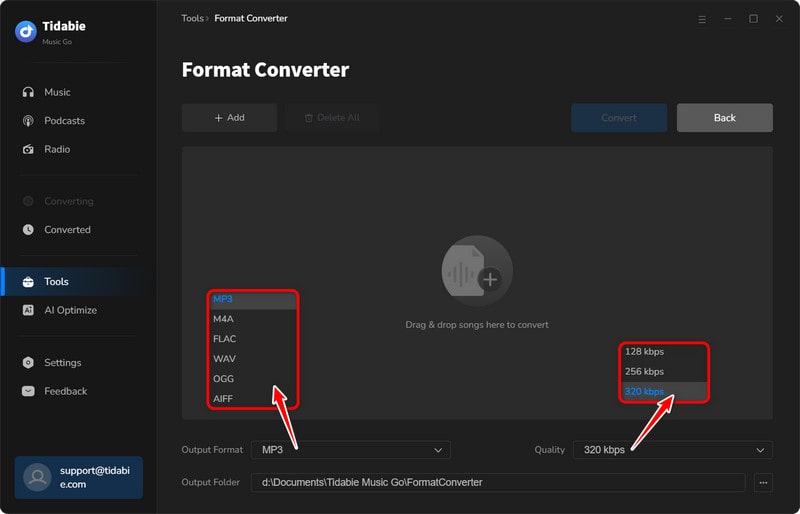
Format Converter is a versatile tool designed to facilitate the conversion of your local audio files to a variety of formats. With this tool, you can easily convert your audio files to popular formats such as MP3, M4A, FLAC, WAV, OGG, and AIFF, allowing you to enjoy your music across different devices and platforms.
STEP 1 Change Output Settings
Head to the "Tools" section on the left-side menu bar, and select "Format Converter". Then, you need to customize the output setting to your preference. You can select the output format, quality, and output folder path in this interface.
STEP 2 Import Local Files
Click on the "+Add" button to locate the local audio files that you want to convert. Select files and confirm. They will be added to Tidabie. You can also add the files by dragging and dropping them into the panel. The supported source formats include MP3, M4A, M4B, WAV, FLAC, OGG, AIFF, and M4R.
STEP 3 Start Conversion
When all the preparations are done, simply click on the "Convert" button to start converting your files.
5.3 Burn CD
Tidabie offers a CD-burning function to give you the utmost convenience and flexibility.
STEP 1 Select Audio Files to Burn
Method 1: Navigate to the "Tools" section and click on the "Burn CD" icon. Insert your disc into your computer. You can either drag and drop your desired songs into the panel or click on "+Add" to browse your local folders and then add files.
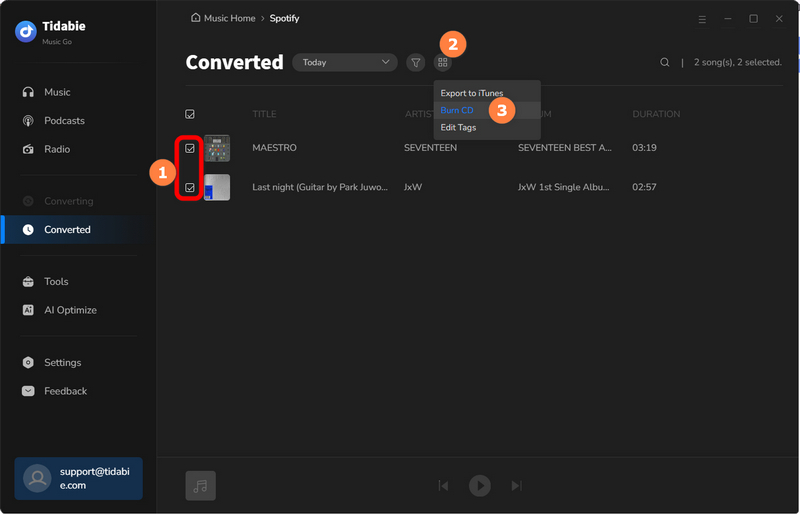
Method 2: If you wish to burn the converted songs, go to the "History" tab, select the items, and then click on the menu icon above the download list to choose "Burn CD".
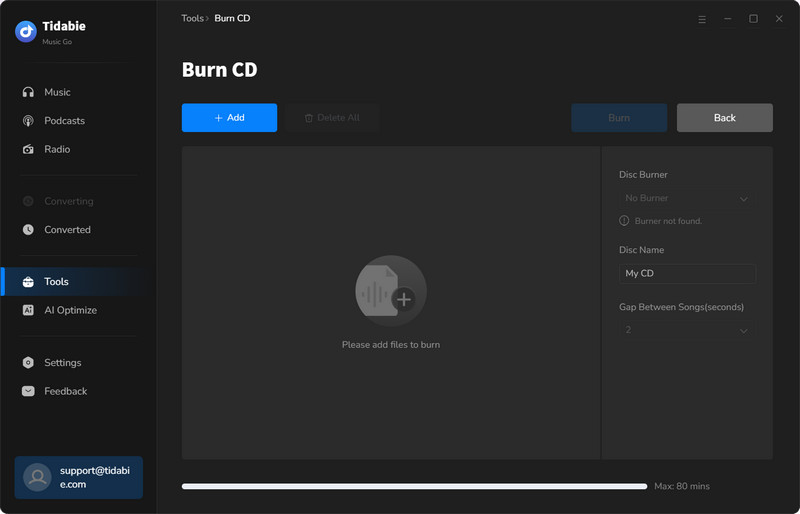
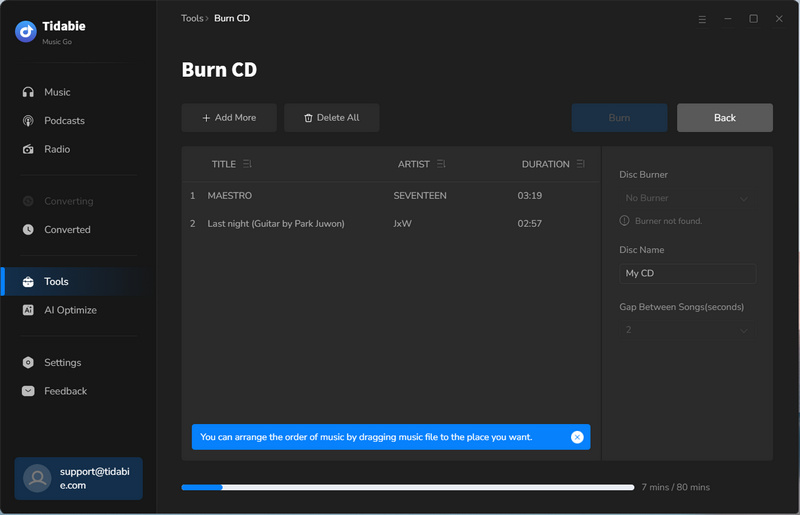
STEP 2 Adjust Settings Accordingly and Burn CD
Change the burning settings, like the disc name and the gap between the songs. Then simply click on the "Burn" button to start burning songs to your CD.
5.4 Audio Editor
Audio Editor is a powerful and easy-to-use audio editing tool that offers a wide range of features such as cutting, splicing, mixing, and applying effects to help you create professional and quality audio recordings.
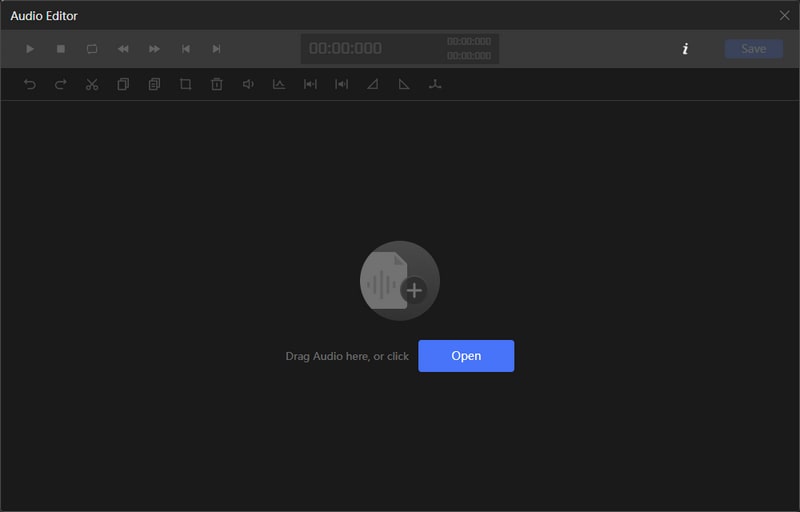
STEP 1 Select Target Audio Files
Choose "Audio Editor" in the "Tools" section. Drag and drop your target audio files to the area or import files by clicking "Open" to browse your local folders and then add files. After selecting the audio you want to edit, the editing window will pop out.
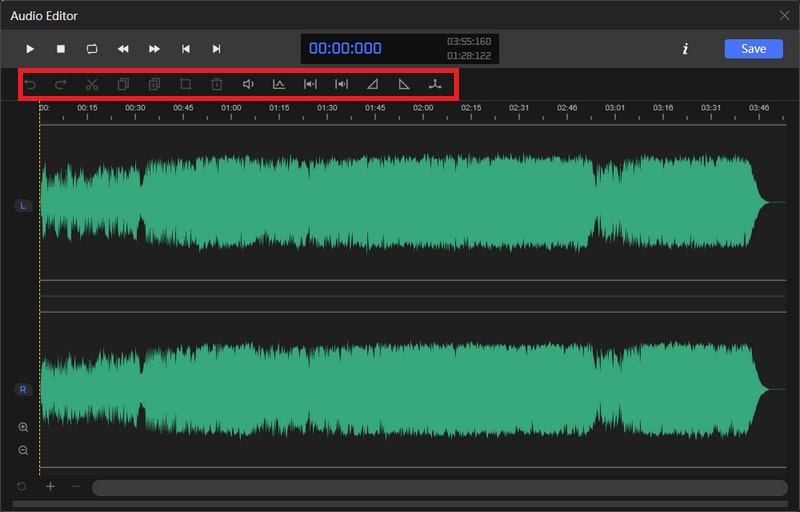
STEP 2 Edit Audio and Save
Use the toolbar above the window to cut, splice, or mix the audio, etc.
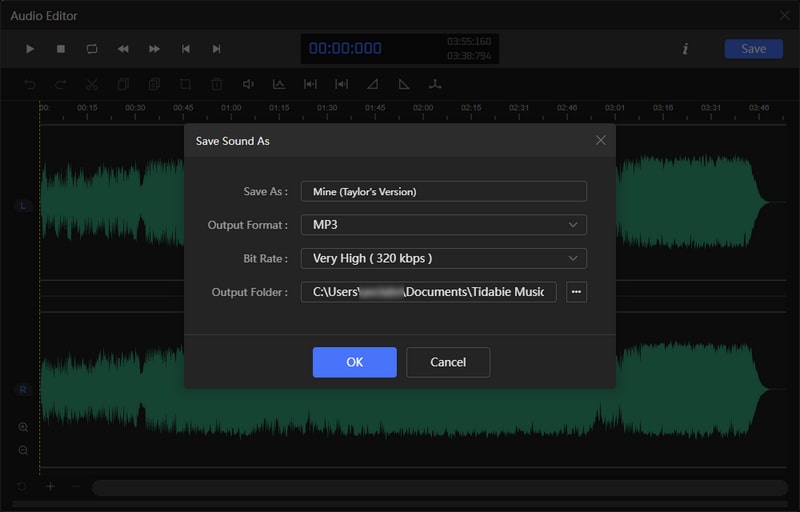
STEP 3 Select Output Settings
Change the file name, output format, bit rate, and output folder according to your references. Click "OK" to save the audio and wait a few seconds. The folder with your edited audio will be automatically opened.
5.5 Tag Editor
Tag Editor is a helpful tool that enables you to manually add tags to your local audio files or adjust the ID3 tags of the converted files to your liking. Here are the steps for utilizing this feature.
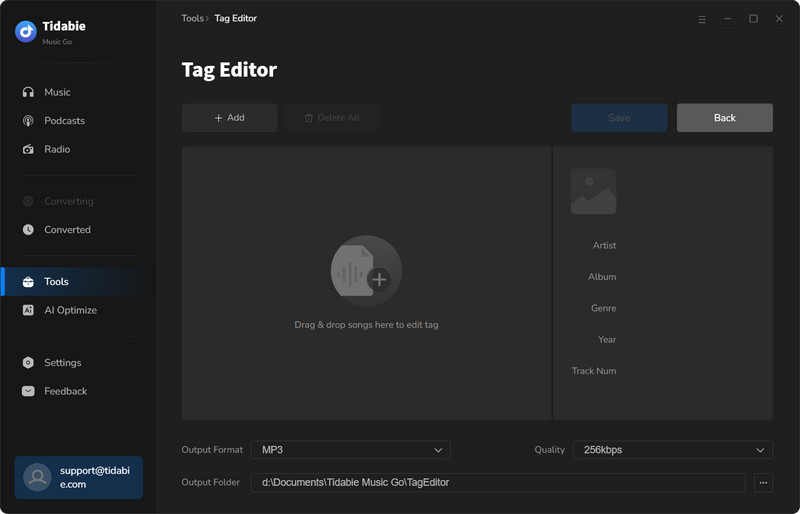
STEP 1 Select Target Audio Files
Method 1: Choose "Tag Editor" in the "Tools" section. Drag and drop your target audio files to the area or import files by clicking "+Add". Tidabie will automatically read the tags of your audio.
Method 2: If you want to edit the converted songs, head to the "History" tab, pick the items, and select "Edit Tags" after clicking on the above menu icon.
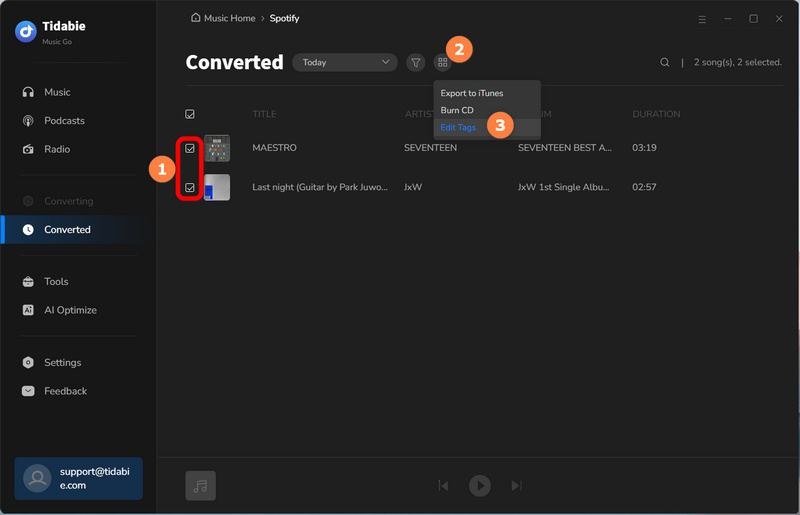
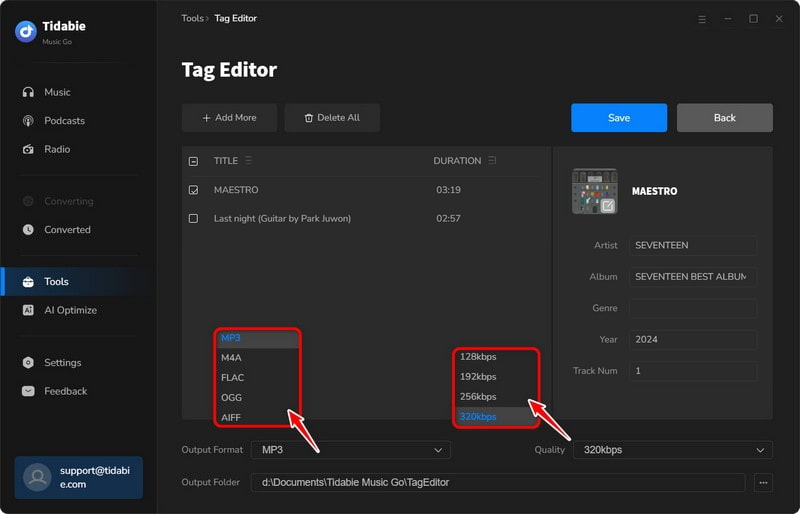
STEP 2 Edit ID3 Tags and Save
When you have selected the item you wish to modify, proceed with adjusting the Artist, Album, Genre, Year, Track Number, and other relevant details. Upon completion, kindly click "Save" to apply the changes. Subsequently, the modifications will be visible in the output file on your local computer.
5.6 Export to iTunes
Tidabie offers a seamless transfer to iTunes, making it effortless to add your converted songs to your iTunes library with just a few clicks.
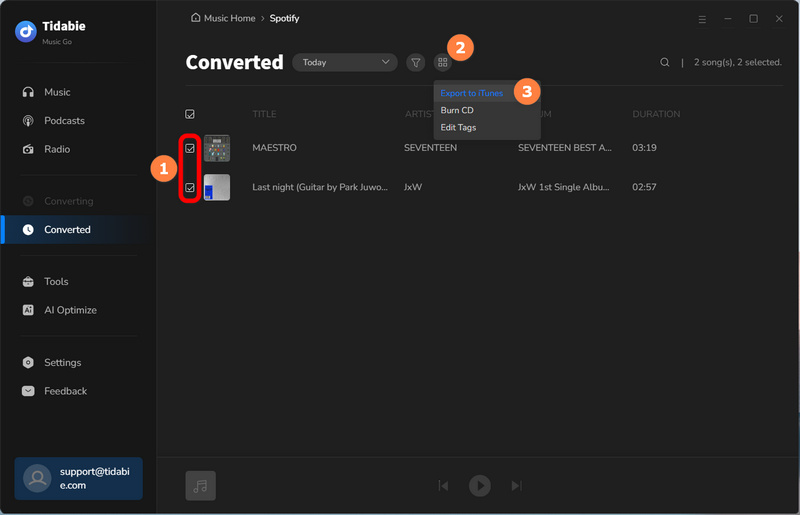
STEP 1 Select Target Converted Songs
After the conversion, head to the "History" module. Choose the target songs, click the menu icon above the list, and select "Export to iTunes".
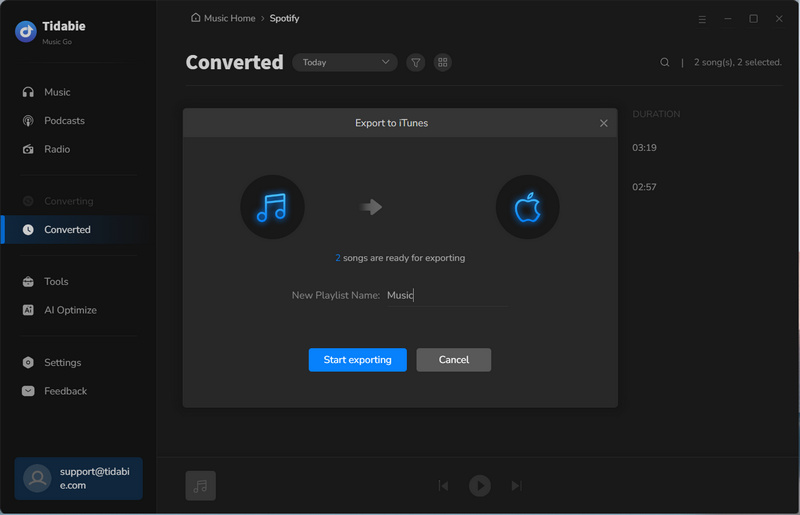
STEP 2 Start Exporting Songs to iTunes
After making your selection, a pop-up window will appear. You can name the playlist and then click "Start exporting" to begin the transfer.
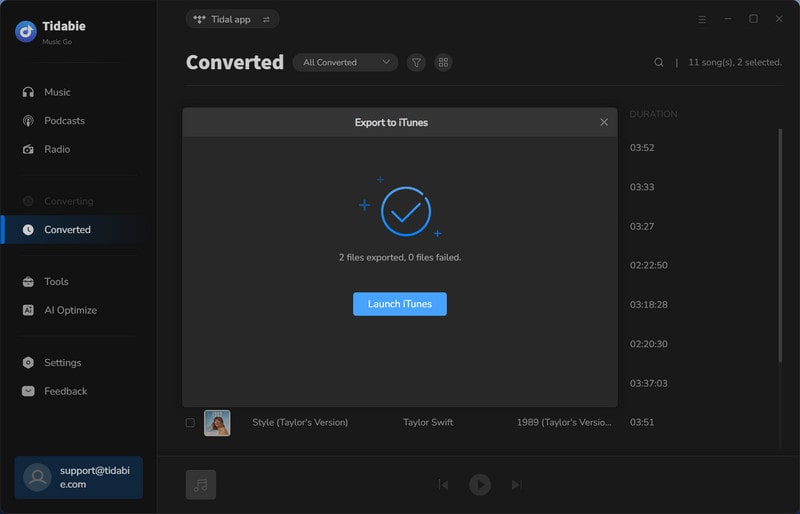
STEP 3 Check Exported Songs in iTunes
After exporting, just tap on "Launch iTunes" to check the exported songs in your iTunes. You can find the playlist imported to iTunes in the "All Playlists" tab.
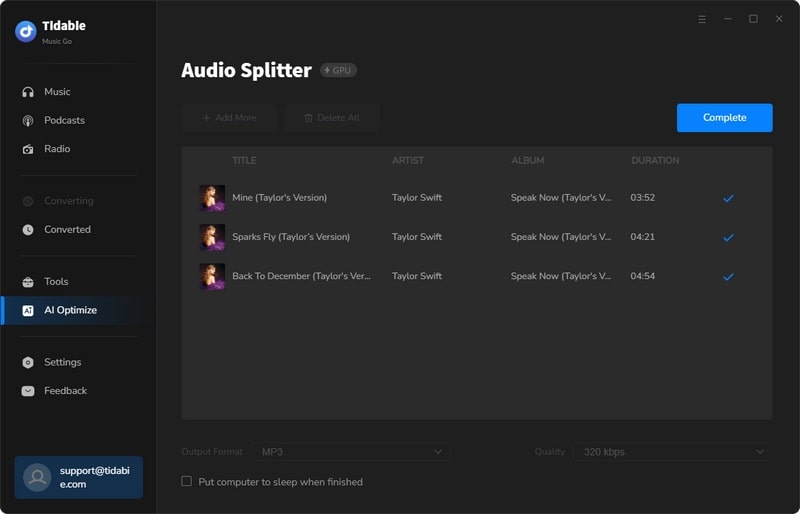
5.7 AI Lab (AI Audio Splitter)
The AI Lab (AI Audio Splitter) function is designed for splitting vocals and instrumental from a song. After splitting, the vocals and instrumental versions of the songs will be separated into two audio files and downloaded to your PC. With these audio files, you can make a karaoke version of the songs easily or you can make multiple innovative usages afterwards.
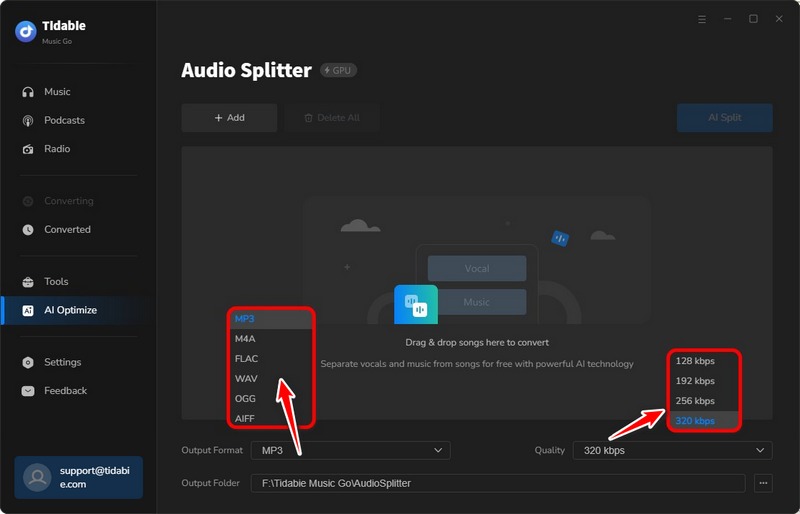
STEP 1 Head to "AI Optimize" and Modify Output Settings
Tap on "AI Lab" to go to the "Audio Splitter" module. In this interface, you can modify the output settings like output format, quality, and output folder path.
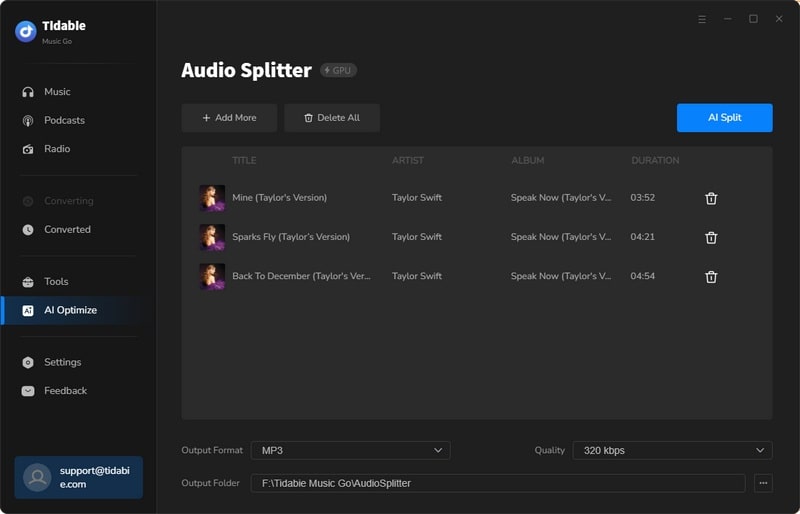
STEP 2 Add Audio Files to Split Vocals and Instrumentals
Click on "+Add" and select the local music files that you want to split. Or you can drag and drop the files onto the panel directly.
STEP 3 Hit "AI Split" to Start Conversion
Once you finish adding audio files, just hit the "AI Split" button to start conversion.
STEP 4 Check Downloaded Vocals and Instrumental Audio Files
As the conversion is finished, the output folder will pop up by default. You can check the downloaded vocals and instrumental audio files in the output folder.