Menu
How to Burn Apple Music to CD
If you’re wondering how to burn your Apple Music tracks to a CD, here’s some detailed information to help you out. Both Apple iTunes and Apple Music allow users to create CDs or DVDs on Mac or Windows computers, but there are certain restrictions in place. To begin, you need to be an Apple Music subscriber. If your playlist contains iTunes Store purchases and all the items are iTunes Plus songs, you can burn them to a disc without limitation. However, if the songs you purchased from the iTunes Store are not in MP3 format and you wish to create an MP3 CD, you’ll first need to convert them to MP3 format before proceeding.
For a hassle-free experience, using a third-party tool can make the process much simpler. Tools like Tidabie Music Go allow you to convert Apple Music songs into local files in plain formats, which can then be burned onto a CD with just a few clicks. By using these steps and tools, you can easily transfer your favorite Apple Music tracks to CDs for personal use.
Part 1. Burn Apple Music Songs to a CD Using the Music App (iTunes Store purchases Only)
Supported Disc Types:
Steps to Burn Songs to a CD:
STEP 1 Open the Music App on your Mac.
STEP 2 Create a playlist with the songs or files you’d like to burn.
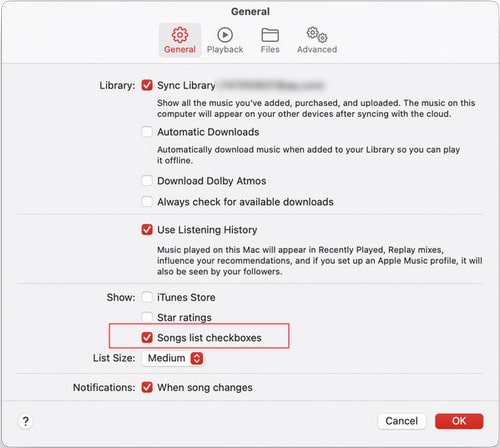
STEP 3 Set the view to View > as Songs and ensure all desired items have a checkmark next to them. If checkmarks aren’t visible, go to Music > Preferences, click General, and enable “Songs list checkboxes.”
STEP 4 Insert a blank disc into your computer.
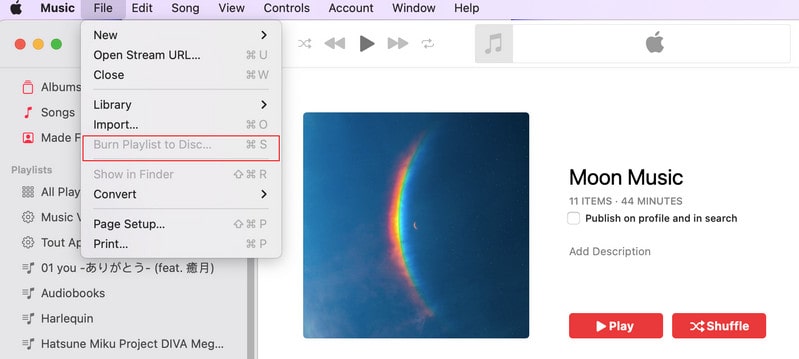
STEP 5 Select your playlist and click File > Burn Playlist to disc.
Note: If this option isn’t available, the playlist may include items with usage restrictions or unplayable content. Generally speaking, you can only burn iTunes Store purchases into a CD by this method.
STEP 6 Choose a disc format when prompted. Click Burn to complete the process.
Part 2. Burn Apple Music Songs to CD without Purchasing
Is there a way to burn Apple Music to CD without purchasing from iTune Store? The answer is absolutely yes. Tidabie Music Go is a powerful tool that allows you to download and manage audio content from various streaming platforms, including Apple Music, Spotify, Tidal, YouTube Music, and more. With Tidabie Music Go, you can effortlessly download songs, albums, playlists, podcasts, and other audio files directly to your computer for offline access without time limitations. The software also includes an integrated feature to help you burn Apple Music tracks to a CD seamlessly. This makes creating a physical copy of your favorite music straightforward and hassle-free. Keep reading to explore how Tidabie Music Go simplifies the process step by step.
Tidabie Music Go
- Batch-download songs, albums, playlists, and podcasts from major streaming services like Apple Music, Spotify, Amazon Music, TIDAL, YouTube Music, etc.
- Preserve original audio quality, such as Spotify HD, Apple Music Lossless (Hi-Res), Amazon Music HD & Ultra HD and more.
- Convert Apple Music to MP3, AAC, WAV, FLAC, AIFF and ALAC.
- 10X download speed & keep full ID3 tags.
- Keep the downloaded songs forever even when your music subscription expires.
- Handy Tools: burn CD, export to iTunes, Audio Splitter, Metadata Editor, etc.
STEP 1 Download and install Tidabie Music Go on your computer. Unlike traditional music converter tools that only support individual streaming platforms, Tidabie Music Go allows you to download music from almost all the popular streaming services (such as Apple Music) effortlessly. Seamlessly transition between platforms without the risk of losing your carefully curated playlists.
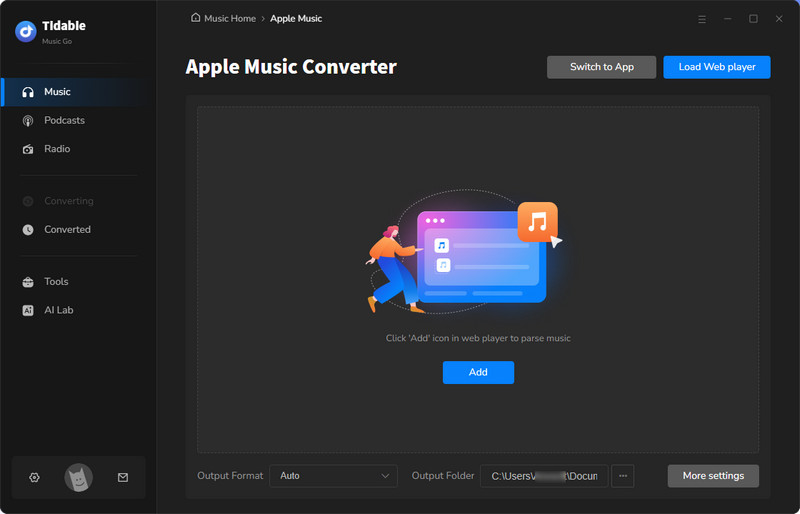
To download free Apple Music songs, please select "Apple Music" from the main interface. Then log into your Apple Music account to load your library.

Tidabie Music Go allows you to download music from multiple sources, including desktop app and music web player. As for the Apple Music source, the available options are Apple Music app, iTunes app and the Apple Music web player. If you would like to switch to another source, just tap on the "Switch to App/Web player" icon in the upper-right corner.
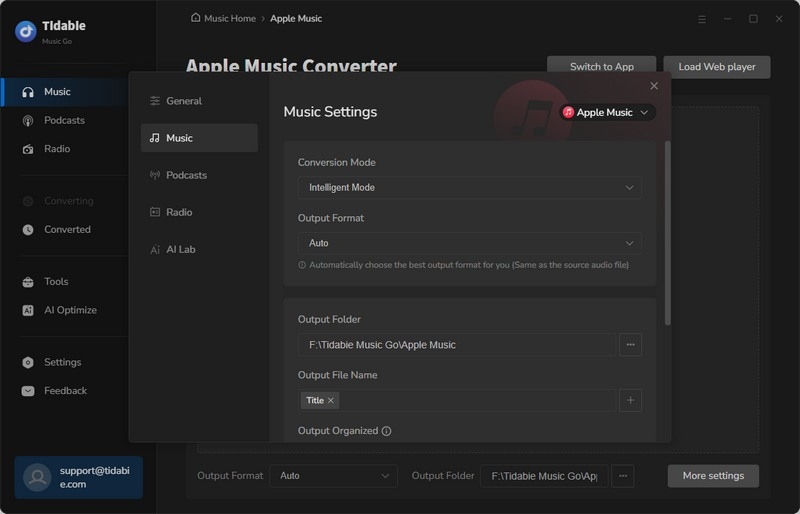
STEP 2 Go to the "Settings" option located in the left-side menu bar, here you can customize the output format, audio quality, download path, download folder structure, etc.
Conversion Mode: choose "Record Mode" to get the best quality.
Output Format: Auto, FLAC, MP3, WAV, ALAC, AIFF, AAC (Auto means keep the original format)
Bit Rate: 128kbps ~ 320kbps (for MP3, AAC)
Bit Depth: 16bit ~ 24bit (for FLAC, WAV, ALAC, AIFF )
Sample Rate: 44.1kHz ~ 192kHz
Output File Name: here you can customize the names of the downloaded songs. For example, when you choose "Track number - Title - Artist", the downloaded songs will look like "01 - Love Story - Taylor Swift". You can add the "-" mark and other delimiter as you like.
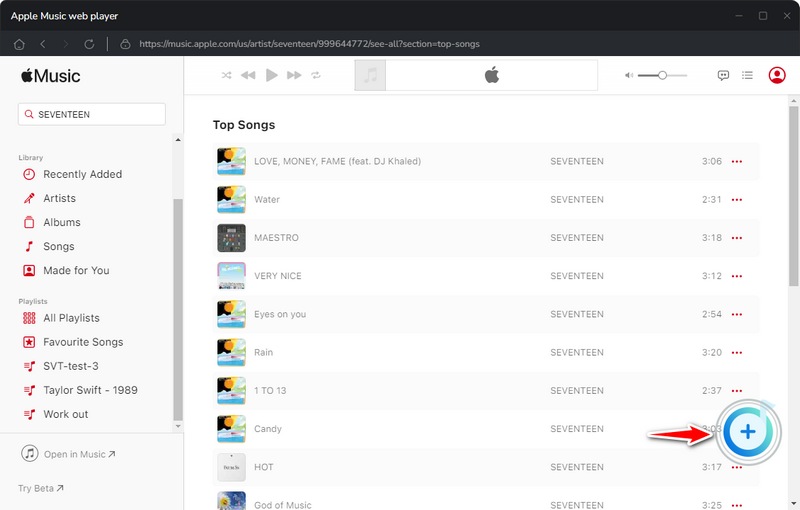
STEP 3 Open any playlist or album you want on Apple Music. Then click the "Click to Add" button in the lower right corner. Add the songs to the convert list via the Add button.
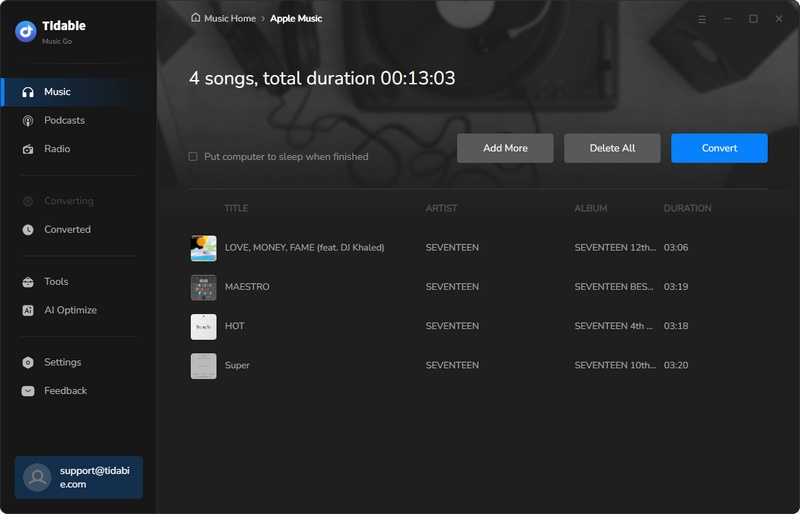
STEP 4 If you would like to choose more songs to download, simply hit "Add More" and choose more songs from other albums or playlists. Then click the "Convert" button to start downloading Apple Music songs.
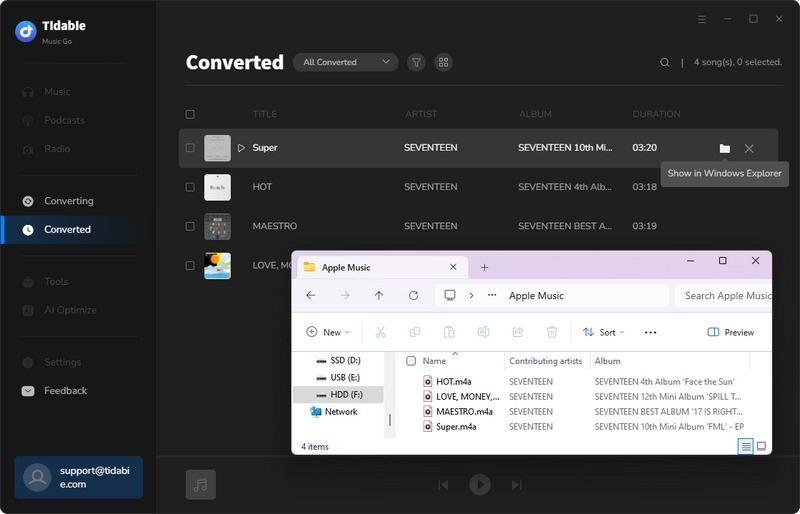
STEP 5 Once the songs are downloaded to the local PC, the output folder will pop up automatically. You can also go to the "Converted" module on the left side to check the complete download history. Click the folder icon near each song to locate the downloaded music file.
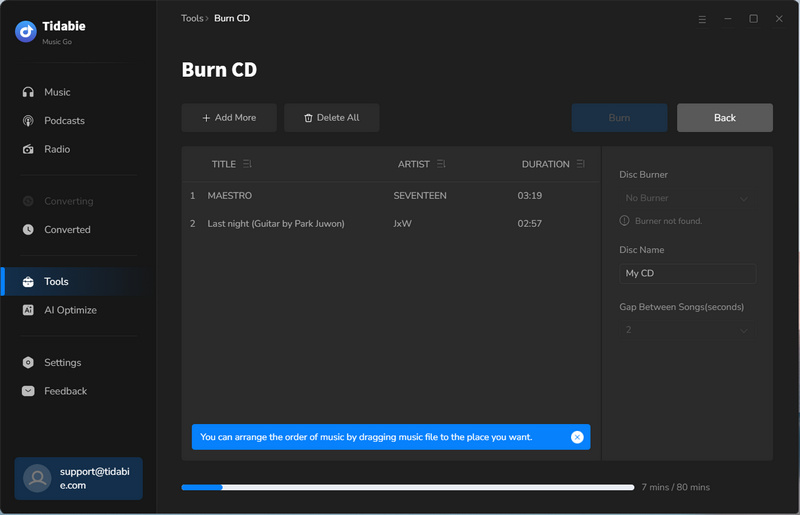
STEP 6 Go to Tools > Burn CD. Add all the songs you want to burn into a CD. You can drag the music file to customize the playback order. Then insert a blank CD into your computer and click the Burn button.
Conclusion:
To burn Apple Music to a CD, the first crucial step is to remove DRM protection and convert the tracks to MP3 format. This ensures compatibility with CD discs. A powerful tool like Tidabie Music Go can help seamlessly handle both DRM removal and MP3 conversion. Once these processes are complete, you can use the Burn CD tool to create your CD effortlessly. Click the download button below to get started!
Jacqueline Swift | Senior Writer
Jacqueline is an experienced writer and a passionate music aficionado with over 5 years of experience in the industry. She provides in-depth reviews and valuable insights on leading music platforms, as well as practical guidance for playing music across various devices in her articles.
Related posts

